【Matplotlib】ArtistAnimationクラスを使用してグラフ内にアニメーションを描画する
投稿日 2021年2月9日 >> 更新日 2023年3月1日
今回はPython外部ライブラリのMatplotlibを使用してグラフ内にアニメーションを描画していきたいと思います。
グラフ描画ライブラリのMatplotlibでは、静止画像の他にリアルタイムもしくわアニメーションといった描画を実装することができます。

アニメーションのようにグラフ内のデータをリアルタイムで動かす機能として幾つか存在しますが、インターネット内で良く試されているのは「plt.claメソッド+plt.pauseメソッド」「ArtistAnimationクラス」「FuncAnimationクラス」だと思われます。
他にもMatplotlibの機能として別のリアルタイム描画の実装を見かけましたが上記の3つが最も多かった印象です。
その3つの機能で最も簡単にアニメーションできるのが「plt.claメソッド+plt.pauseメソッド」を使用した方法です。
「plt.claメソッド+plt.pauseメソッド」での実装はfor文内に描画したいグラフ「plt.claメソッド+プロット+plt.pauseメソッド」のように挟むことでデータを順次更新しながら描画させていくので簡単ですが、「gif」ファイルや「mp4」ファイルなどに保存することができません。
# 「plt.claメソッド+plt.pauseメソッド」の例

import matplotlib.pyplot as plt

data = []
for i in range(10):
    plt.cla() # 描画されたデータをリセット
    data.append(i)
    plt.xlim(0, 10) # x軸固定
    plt.ylim(0, 10) # y軸固定
    plt.plot(data, data) # 描画
    plt.pause(1) # 描画されたグラフを一時的に留める
上記の詳しい実装は以下の記事をご参照ください。
残り2つのアニメーション機能ではオブジェクトを設定してからアニメーションしていくので、少し手間ですが「gif」「mp4」のような動画ファイルを作成することができます。
そして「ArtistAnimationクラス」と「FuncAnimationクラス」の違いは、シンプルな実装→「ArtistAnimationクラス」と複雑な実装が可能→「FuncAnimationクラス」であるという個人的な結果となりました。
FuncAnimationクラスについては以下の記事をご参照ください。
ArtistAnimationクラスでの実装は「plt.claメソッド+plt.pauseメソッド」での実装と同じようなコーディングで実装できるので分かりやすいですが、FuncAnimationクラスではパラメータ引数が多くロジックを理解するのが少し面倒です。
なのでここでは「ArtistAnimationクラス」を中心に実装していきたいと思います。
実行環境&使用ライブラリ
| 実行環境 |
|---|
| Windows Subsystem for Linux |
| Python 3.6.9 |
| pip 9.0.1 |
| jupyter notebook |
| ffmpeg |
| 使用ライブラリ | ライセンス |
|---|---|
| matplotlib==3.1.1 | PSF |
| Pillow==6.1.0 | HPND |
ArtistAnimationでアニメーション描画
ArtistAnimationクラスのパラメータ引数は以下のようになっています。
ArtistAnimation(
    fig=figureオブジェクト, # 図
    artists=artist_listオブジェクト, # プロットオブジェクトが格納されたリストオブジェクト
    interval=200, # 処理速度のミリ秒
    repeat_delay=None, # repeatがTrueの場合、処理が終わった後の遅延ミリ秒
    repeat=True, # 繰り返す場合
    blit=False # 描画を最適化するための制御
)
「fig」「artists」は必須引数で、それ以外はデフォルト値として設定されています。
シンプルなアニメーション描画
必須引数の「fig、artists」と「interval」を設定してシンプルなアニメーションを描画していきます。
import matplotlib.pyplot as plt
from matplotlib.animation import ArtistAnimation
# jupyter notebook環境の場合
%matplotlib

y = [0] * 30

x_data = []
y_data = []
artist_list = []

fig, ax = plt.subplots()

for index, i in enumerate(y):
    ax.set_xlim(0, 30)
    ax.set_ylim(-1, 1)
    x_data.append(index)
    y_data.append(i)
    line, = ax.plot(x_data, y_data) # line2Dオブジェクトを取得
    # line = axplot(x_data, y_data) # listオブジェクトとして取得=>[line2Dオブジェクト]
    artist_list.append([line]) # line2Dをlistオブジェクトとして追加
    # artist_list.append(line) # listオブジェクトの場合はそのまま渡す


ani = ArtistAnimation(
    fig=fig, # 図
    artists=artist_list, # 出来上がったグラフのリストを渡す
    interval=100,
)

artists引数にはリストのリストを渡す
プロットオブジェクトを格納しているfor文内では、「line,」と「line」としてプロットオブジェクトを代入している2行があります。
for index, i in enumerate(y):
    ...
    ...
    line, = ax.plot(x_data, y_data) # line2Dオブジェクトを取得
    # line = axplot(x_data, y_data) # listオブジェクトとして取得=>[line2Dオブジェクト]
    artist_list.append([line]) # line2Dをlistオブジェクトとして追加
    # artist_list.append(line) # listオブジェクトの場合はそのまま渡す
変数末尾に「,」を付けるか付けないかでプロットオブジェクトの返り値が異なります。
# 「,」を付けた場合
line, = ax.plot([0], [0])
print(type(line))
# <class 'matplotlib.lines.Line2D'>

# 付けない場合
line = ax.plot([0], [0])
print(type(line))
print(type(line[0]))
# <class 'list'>
# <class 'matplotlib.lines.Line2D'>
artists引数に渡す「artist_list」ではリストオブジェクトとして追加する必要があるので、プロットオブジェクトをそのまま追加してしまうと「TypeError: 'Line2D' object is not iterable」というエラーになってしまいます。
line, = ax.plot([0], [0])
artist_list(line)
ani = ArtistAnimation(fig, artist_list)
TypeError: 'Line2D' object is not iterable
ArtistAnimationクラスでのartists引数に着目したソースコードは以下となっています。
# ArtistAnimationクラス内の1部抜粋

for f in self.new_frame_seq(): # artists=[[i, i, i], [k, k, k]]
    for artist in f: # [i, i, i]
        ...
結果的にartists引数に渡すリストは、[[ax.plot, ax.text, etc], [ax.plot, ax.text, etc]]のような形になっている必要があります。
この後は図にタイトル、グラフ内にテキストの書き込みを実装していくのでその辺も参考にしてみてください。
尚、棒グラフや円グラフといった複数のプロット、複数のグラフを描画したアニメーションは以下で実装しています。
データに動きを付けたシンプルなアニメーション描画
プロットするデータを変更し、ラインに変化を付けたアニメーションを実装してみます。
タイトルですが、通常なら「ax.set_title()」を使用するところ「ax.text()」で位置を定めてタイトル化させています。
import matplotlib.pyplot as plt
from matplotlib.animation import ArtistAnimation
# jupyter notebook環境の場合
%matplotlib

y = [0] * 30
# yの10, 11, 12, 13, 14, 15, 16番目の要素を変更
y[10], y[11], y[12], y[13], y[14], y[15], y[16] = 0.05, -0.05, 0.05, -0.05, 0.05, -0.05, 0.4

x_data = []
y_data = []
artist_list = []

fig, ax = plt.subplots()

for index, i in enumerate(y):
    ax.set_xlim(0, 30)
    ax.set_ylim(-1, 1)
    x_data.append(index)
    y_data.append(i)
    line, = ax.plot(x_data, y_data)
    title = ax.text(0, 1.05, 'ArtistAnimation: {}'.format(index), fontsize=15) # 追加
    artist_list.append([line, title]) # リスト内にtitleを追加


ani = ArtistAnimation(
    fig=fig,
    artists=artist_list,
    interval=100,
)
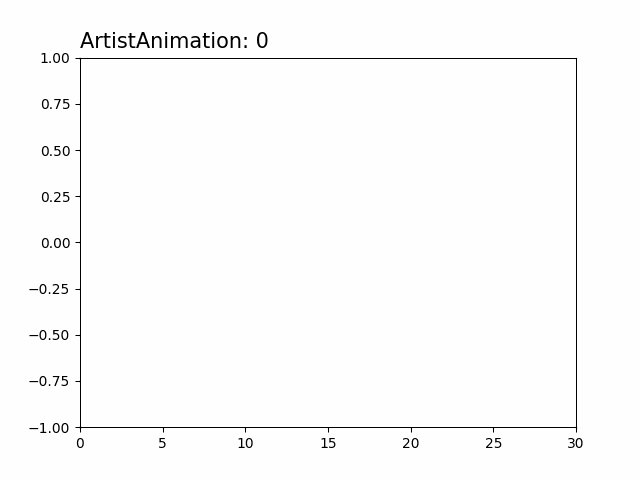
グラフにタイトルを表示させる場合は「ax.set_title()」で問題無いのですが、上図のようにArtistAnimationで更新させようとすると上手く表示されません。
なので「ax.text(x軸, y軸, テキスト)」でグラフ上部にテキストを定め表示させています。
グラフ内にテキストを組み合わせたアニメーション描画
「title」変数でも使用しているMatplotlibのTextオブジェクトを少し操作したアニメーションです。
それ以外は特に変更していません。
import matplotlib.pyplot as plt
from matplotlib.animation import ArtistAnimation
# jupyter notebook環境の場合
%matplotlib

y = [0] * 30
y[10], y[11], y[12], y[13], y[14], y[15], y[16] = 0.05, -0.05, 0.05, -0.05, 0.05, -0.05, 0.4

faces = ['(^.^)y-~', '\(0o0)/ -'] # 追加
numbers = [10, 12, 14, 16] # 追加

x_data = []
y_data = []
artist_list = []

fig, ax = plt.subplots()

for index, i in enumerate(y):
    ax.set_xlim(0, 30)
    ax.set_ylim(-1, 1)
    x_data.append(index)
    y_data.append(i)
    line, = ax.plot(x_data, y_data)
    title = ax.text(0, 1.05, 'ArtistAnimation: {}'.format(index), fontsize=15)
    textvar = ax.text(0, 0, None) # 追加

    """ ------- ここから追加 --------- """
    if index >= 10: # リストの10番目の要素からテキストを描画する
        index -= 9 # 顔文字のポジションをずらす

        if index in numbers: # numbers = [10, 12, 14, 16]
            textvar.set_position((index, y_data[index]+0.1))
            textvar.set_text(faces[1]) # \(0o0)/ -

        else:
            textvar.set_position((index, y_data[index]+0.05))
            textvar.set_text(faces[0]) # (^.^)y-~
    """ ------ ここまで追加 ----------"""

    artist_list.append([line, textvar, title]) # textvarを追記


ani = ArtistAnimation(
    fig=fig,
    artists=artist_list,
    interval=100,
)

gifファイルとmp4ファイルの保存
gifファイルへ保存
描画したアニメーションをgifファイルへ保存するには、画像処理ツールの「ImageMagick」、もしくわPython外部ライブラリの「pillow」が必要となります。
ここではpillowをインストールしてgifファイルの保存を行います。
$ pip install pillow
インストールされていれば、以下の2通りの方法でgifファイルへ保存することができます。
# アニメーションオブジェクト
ani = ArtistAnimation()

# 方法1
ani.save("animation_1.gif", writer="pillow")

# 方法2
from matplotlib.animation import PillowWriter

ani.save("animation_2.gif", writer=PillowWriter)
保存の詳細に関しては公式ドキュメントをご参照ください。
mp4ファイルへ保存
mp4ファイルへ保存するには、動画・音声処理ライブラリの「FFmpeg」ツールをインストールします。
私の実行環境はWindows Subsystem for Linuxなので、Linuxコマンドでのインストールとなります。
※各OS環境のインストール方法で行ってください。
$ sudo apt install ffmpeg
インストールされていれば、以下の2通りの方法でmp4ファイルへ保存することができます。
# アニメーションオブジェクト
ani = ArtistAnimation()

# 方法1
ani.save("animation_1.mp4", writer="ffmpeg")

# 方法2
from matplotlib.animation import FFMpegWriter

ani.save("animation_2.mp4", writer=FFMpegWriter)
画質などの調整もできるので、保存の詳細に関しては公式ドキュメントをご参照ください。
FuncAnimationクラスの実装に関して
FuncAnimationの実装はArtistAnimationと違って複雑な設定を行える機能です。
複雑さ故に説明が長くなってしまうので、宜しければ以下の記事をご参照ください。
今回は以上となります。
最後までご覧いただきありがとうございました。