【Python】Hatchプロジェクトマネージャーでパッケージング化に必要な環境構築の自動化をする
投稿日 2023年6月15日 >> 更新日 2023年7月1日
概要
Hatchを使って、Pythonの配布用パッケージ等で必要な構成ファイル群の作成やビルド・リリースといったプロセスをコマンドで自動作成します。
Pythonプロジェクトのパッケージングについてはこちら「【Python】自作モジュールを配布物用にパッケージ化して、pipでインストールできるようにする」をご覧ください。
実行環境&使用ライブラリ
| 実行環境 |
|---|
| Windows Subsystem for Linux |
| Python 3.10.0 |
| 使用ライブラリ | ライセンス |
|---|---|
| hatch==1.7.0 | MIT |
Hatchについて
HatchはPythonの配布用パッケージを開発する上で非常に便利なツールです。
モジュール自体は私たちが開発していきますが、開発する上で必要になってくるファイルや環境をコマンド1つで取り揃えてくれます。
例えば、Hatchを使わずにプロジェクトを進めていくと、以下のようなファイルを作成するかと思います。
-
pyproject.toml:モジュールのビルドバックエンドの設定やバージョン情報、その他依存関係等のメタデータの設定ファイル
-
README.md:モジュールを使用する人に向けてのドキュメント
-
LICENSE:モジュールの取扱いについてのライセンス
-
src:モジュールのソースコードがまとめられたディレクトリ
-
tests:モジュールに対してのテスト用ディレクトリ
さらにモジュールをテストするためにモジュールの依存関係にあるサードパーティやPythonリンター、そしてPythonのテストツールに対しての環境構築。
最後にモジュールを配布用パッケージにするためビルドツールをインストールして実行。
パッケージのインストールに対しては各自お使いの仮想環境下で実行するかと思います。
上記の内容を実際に取り組んだことを以下の記事にてまとめているので宜しければご覧ください。
上記はすべて手動で作成及び実行していきますが、Hatchを使うことでほぼ自動で完結できてしまいます。
Hatchで操作できるコマンドを使えば、「プロジェクトの立ち上げ」「Hatch独自の仮想環境下での実行やテスト」「ビルドをして公開」ができます。
詰まり、開発モジュールに依存するサードパーティやテストツールの為に自ら環境を構築しなくても良いというのが、「Hatch」の強みでしょう。
先ほどの「Hatchを使うことでほぼ自動で完結できてしまいます。」は語弊があるかもしれませんが、Hatchの設定ファイルをカスタマイズすることによって柔軟な利用が可能になってくるかと思います。
Hatchの実装
pipでインストールします。
$ pip install hatch
インストールが完了したら、Hatchで実行できるコマンドを確認します。
$ hatch --help
Usage: hatch [OPTIONS] COMMAND [ARGS]...

   _   _       _       _
  | | | |     | |     | |
  | |_| | __ _| |_ ___| |__
  |  _  |/ _` | __/ __| '_ \
  | | | | (_| | || (__| | | |
  \_| |_/\__,_|\__\___|_| |_|

Options:
  -e, --env TEXT                  The name of the environment to use [env var:
                                  `HATCH_ENV`]
  -p, --project TEXT              The name of the project to work on [env var:
                                  `HATCH_PROJECT`]
  --color / --no-color            Whether or not to display colored output
                                  (default is auto-detection) [env vars:
                                  `FORCE_COLOR`/`NO_COLOR`]
  --interactive / --no-interactive
                                  Whether or not to allow features like
                                  prompts and progress bars (default is auto-
                                  detection) [env var: `HATCH_INTERACTIVE`]
  -v, --verbose                   Increase verbosity (can be used additively)
                                  [env var: `HATCH_VERBOSE`]
  -q, --quiet                     Decrease verbosity (can be used additively)
                                  [env var: `HATCH_QUIET`]
  --data-dir TEXT                 The path to a custom directory used to
                                  persist data [env var: `HATCH_DATA_DIR`]
  --cache-dir TEXT                The path to a custom directory used to cache
                                  data [env var: `HATCH_CACHE_DIR`]
  --config TEXT                   The path to a custom config file to use [env
                                  var: `HATCH_CONFIG`]
  --version                       Show the version and exit.
  -h, --help                      Show this message and exit.

Commands:
  build    Build a project
  clean    Remove build artifacts
  config   Manage the config file
  dep      Manage environment dependencies
  env      Manage project environments
  new      Create or initialize a project
  project  View project information
  publish  Publish build artifacts
  run      Run commands within project environments
  shell    Enter a shell within a project's environment
  status   Show information about the current environment
  version  View or set a project's version
「Commands」を見ると様々なコマンドが用意されているのが分かります。
各コマンドにもオプションや使い方などのヘルプページが用意されているので、確認してみます。
「new」コマンドの詳細を表示してみます。
$ hatch new --help
Usage: hatch new [OPTIONS] [NAME] [LOCATION]

  Create or initialize a project.

Options:
  -i, --interactive  Interactively choose details about the project
  --cli              Give the project a command line interface
  --init             Initialize an existing project
  -h, --help         Show this message and exit.
「new」コマンドでは、プロジェクトの作成または初期化を実行するとあります。
気になるコマンドがあったら「--help」オプションを添えて確認してみて下さい。
プロジェクトの新規作成
Hatchを使用したプロジェクトの新規作成は「new」コマンドの引数にプロジェクト名を与えます。
$ hatch new hatch-project
すると、「hatch-project」というディレクトリが作成され、モジュールをビルドするために必要な設定ファイルやライセンス情報等のファイルが自動で作成されます。
hatch-project
├── src
│   └── hatch_project
│       ├── __about__.py
│       └── __init__.py
├── tests
│   └── __init__.py
├── LICENSE.txt
├── README.md
└── pyproject.toml
プロジェクトが作成されたら、プロジェクトディレクトリへ移動し開発を開始していきます。
それぞれのファイルの中身を確認していきます。
「LICENSE.txt」ファイルでは「MIT」ライセンスがデフォルトで作成されます。
$ cat LICENSE.txt
MIT License

Copyright (c) 2023-present User-Name <sample@example.com>

Permission is hereby granted, free of charge, to any person obtaining a copy of this software and associated documentation files (the "Software"), to deal in the Software without restriction, including without limitation the rights to use, copy, modify, merge, publish, distribute, sublicense, and/or sell copies of the Software, and to permit persons to whom the Software is furnished to do so, subject to the following conditions:

The above copyright notice and this permission notice shall be included in all copies or substantial portions of the Software.

THE SOFTWARE IS PROVIDED "AS IS", WITHOUT WARRANTY OF ANY KIND, EXPRESS OR IMPLIED, INCLUDING BUT NOT LIMITED TO THE WARRANTIES OF MERCHANTABILITY, FITNESS FOR A PARTICULAR PURPOSE AND NONINFRINGEMENT. IN NO EVENT SHALL THE AUTHORS OR COPYRIGHT HOLDERS BE LIABLE FOR ANY CLAIM, DAMAGES OR OTHER LIABILITY, WHETHER IN AN ACTION OF CONTRACT, TORT OR OTHERWISE, ARISING FROM, OUT OF OR IN CONNECTION WITH THE SOFTWARE OR THE USE OR OTHER DEALINGS IN THE SOFTWARE.
「README.md」ファイルでは、最低限必要なパッケージの情報が記載れた内容で作成されます。
$ cat README.md
# hatch-project
[](https://pypi.org/project/hatch-project)
[](https://pypi.org/project/hatch-project)
-----
**Table of Contents**
- [Installation](#installation)
- [License](#license)
## Installation
```console
pip install hatch-project
```
## License
`hatch-project` is distributed under the terms of the [MIT](https://spdx.org/licenses/MIT.html) license.
「pyproject.toml」は、モジュールにとっての設定ファイルでメタデータが定義されています。
以下のメタデータの内容はHatchの「config.toml」に設定されているデフォルト値です。
モジュールの簡単な説明や依存関係にあるパッケージの定義はセルフで行います。
$ cat pyproject.toml
[build-system]
requires = ["hatchling"]
build-backend = "hatchling.build"

[project]
name = "hatch-project"
dynamic = ["version"]
description = ''
readme = "README.md"
requires-python = ">=3.7"
license = "MIT"
keywords = []
authors = [
  { name = "User-Name", email = "sample@example.com" },
]
classifiers = [
  "Development Status :: 4 - Beta",
  "Programming Language :: Python",
  "Programming Language :: Python :: 3.7",
  "Programming Language :: Python :: 3.8",
  "Programming Language :: Python :: 3.9",
  "Programming Language :: Python :: 3.10",
  "Programming Language :: Python :: 3.11",
  "Programming Language :: Python :: Implementation :: CPython",
  "Programming Language :: Python :: Implementation :: PyPy",
]
dependencies = []

[project.urls]
Documentation = "https://github.com/unknown/hatch-project#readme"
Issues = "https://github.com/unknown/hatch-project/issues"
Source = "https://github.com/unknown/hatch-project"

[tool.hatch.version]
path = "src/hatch_project/__about__.py"

[tool.hatch.envs.default]
dependencies = [
  "coverage[toml]>=6.5",
  "pytest",
]
[tool.hatch.envs.default.scripts]
test = "pytest {args:tests}"
test-cov = "coverage run -m pytest {args:tests}"
cov-report = [
  "- coverage combine",
  "coverage report",
]
cov = [
  "test-cov",
  "cov-report",
]

[[tool.hatch.envs.all.matrix]]
python = ["3.7", "3.8", "3.9", "3.10", "3.11"]

[tool.hatch.envs.lint]
detached = true
dependencies = [
  "black>=23.1.0",
  "mypy>=1.0.0",
  "ruff>=0.0.243",
]
[tool.hatch.envs.lint.scripts]
typing = "mypy --install-types --non-interactive {args:src/hatch_project tests}"
style = [
  "ruff {args:.}",
  "black --check --diff {args:.}",
]
fmt = [
  "black {args:.}",
  "ruff --fix {args:.}",
  "style",
]
all = [
  "style",
  "typing",
]

[tool.black]
target-version = ["py37"]
line-length = 120
skip-string-normalization = true

[tool.ruff]
target-version = "py37"
line-length = 120
select = [
  "A",
  "ARG",
  "B",
  "C",
  "DTZ",
  "E",
  "EM",
  "F",
  "FBT",
  "I",
  "ICN",
  "ISC",
  "N",
  "PLC",
  "PLE",
  "PLR",
  "PLW",
  "Q",
  "RUF",
  "S",
  "T",
  "TID",
  "UP",
  "W",
  "YTT",
]
ignore = [
  # Allow non-abstract empty methods in abstract base classes
  "B027",
  # Allow boolean positional values in function calls, like `dict.get(... True)`
  "FBT003",
  # Ignore checks for possible passwords
  "S105", "S106", "S107",
  # Ignore complexity
  "C901", "PLR0911", "PLR0912", "PLR0913", "PLR0915",
]
unfixable = [
  # Don't touch unused imports
  "F401",
]

[tool.ruff.isort]
known-first-party = ["hatch_project"]

[tool.ruff.flake8-tidy-imports]
ban-relative-imports = "all"

[tool.ruff.per-file-ignores]
# Tests can use magic values, assertions, and relative imports
"tests/**/*" = ["PLR2004", "S101", "TID252"]

[tool.coverage.run]
source_pkgs = ["hatch_project", "tests"]
branch = true
parallel = true
omit = [
  "src/hatch_project/__about__.py",
]

[tool.coverage.paths]
hatch_project = ["src/hatch_project", "*/hatch-project/src/hatch_project"]
tests = ["tests", "*/hatch-project/tests"]

[tool.coverage.report]
exclude_lines = [
  "no cov",
  "if __name__ == .__main__.:",
  "if TYPE_CHECKING:",
]
「src」ディレクトリにはソースコードを配置していきます。
src
└── hatch_project
    ├── __about__.py
    └── __init__.py
「__about__.py」にはモジュールのライセンスやバージョン情報が定義されています。
# __about__.py

# SPDX-FileCopyrightText: 2023-present User-Name <sample@example.com>
#
# SPDX-License-Identifier: MIT
__version__ = "0.0.1"
開発モジュールのソースコードは、「src/hatch_project/」に配置します。
以下のサンプルモジュールを使用して配置します(【Python】unittest(単体テスト)モジュールで自動テストを行うより)。
# scraping.py
import time

from bs4 import BeautifulSoup as bs4
import requests

class Scp(object):

    def set_url_and_tag(self, url, tag, attrs={}):

        if 'https://' not in url:
            raise ValueError(
                    'Invalid URL:Example is https://example.com/.')

        time.sleep(1)
        request = requests.get(url)
        soup = bs4(request.content, 'html.parser')
        value = soup.find_all(tag, attrs=attrs)
        datas = []

        for val in value:
            datas.append(val.text)
        return datas
src
└── hatch_project
    ├── __about__.py
    ├── __init__.py
    └── scraping.py # ソースコード
「tests」はモジュールのテストファイルを配置するためのディレクトリです。
tests
└── __init__.py
以下のサンプルテストを使用して配置します(【Python】unittest(単体テスト)モジュールで自動テストを行うより)。
import unittest

from src.hatch_project.scraping import Scp # パスが通るように編集
# from scraping import Scp


class ScpTest(unittest.TestCase):

    def setUp(self):
        # クラスを初期化
        self.scp = Scp()
        print('初期化')

    def tearDown(self):
        # クラスを削除
        del self.scp
        print('削除')

    def test_set_url_and_tag(self):
        url = 'https://zerofromlight.com/blogs/'
        tag = 'h5'
        datas = self.scp.set_url_and_tag(url, tag)
        # データ型の判定
        self.assertIsInstance(datas, list,
                '戻り値はリスト型である')

    def test_set_url_and_tag_raise(self):
        no_https_url = 'zerofromlight.com/blogs'
        tag = 'h5'
        with self.assertRaisesRegex(ValueError,
                'Invalid URL:Example is https://example.com/.'):
            self.scp.set_url_and_tag(no_https_url, tag)
tests
├── __init__.py
└── test_scraping.py
Hatchによるプロジェクトの作成と各種ファイルの内容や配置場所については上記の通りです。
依存関係の設定とrequirements.txtの読み込み
Hatchのプロジェクトマネージャーを実行して、その開発モジュールに依存関係のパッケージがある場合は「pyproject.toml」に追記する必要があります。
今回開発しているモジュールに依存しているパッケージは「requests」と「bs4」です。
例として上記2つのパッケージを依存関係として設定していきます。
依存パッケージ読み込みの設定は2通りの方法があり、1つ目は「project」テーブルの「dependencies」キーにパッケージ名を定義する方法。2つ目は「project」テーブルの「dynamic」キーにrequirements.txtを定義して動的にインストールする方法があります。
「dependencies」キーに定義する方法。
エディターで「pyproject.toml」開いて、27行目辺りにある「dependencies」キーを編集します。
キーに与える値は、Pythonのリスト型のような構文で記述します。
※パッケージを区切る「,」を忘れずに記述します。
# pyproject.toml

[project]
...
...
dependencies =  [
    "bs4 == 0.0.1",
    "requests >= 2.28.2",
]
「run」コマンドを使うと、Hatch独自の仮想環境で実行できるのでパッケージがインストールされるか試してみます。
$ hatch run python3 -c "import requests; print(requests.__version__)"
2.31.0
「requests」ライブラリのバージョンをプリントできたので無事インストールされています。
「dynamic」キーにrequirements.txtを定義する方法。
依存関係をrequirements.txtから読み込む場合は、プラグインを利用します。
HatchのWebサイトからプラグインをフックする方法にアクセスできます。
以下はプラグインを利用したrequirements.txtの読み込みです。
# pyproject.toml

[build-system]
requires = ["hatchling", "hatch-requirements-txt"]
...

[project]
name = "hatch-project"
dynamic = ["version", "dependencies"]
...
# dynamicに定義する場合はコメントアウトor削除
# dependencies = []

...

[tool.hatch.metadata.hooks.requirements_txt]
files = ["requirements.txt"]
編集箇所は4か所です。
-
build-system.requiresキーに「hatch-requirements-txt」を追加
-
project.dynamicキーに「dependencies」を追加
-
project.dependenciesキーをコメントアウトor削除
-
tool.hatch.metadata.hooks.requirements_txt.filesキーを追記して、「requirements.txt」を設定
設定が完了したら、依存パッケージをrequirements.txtに書き込みます。
$ echo -e "bs4 == 0.0.1\nrequests >= 2.28.2" >> requirements.txt
.
├── LICENSE.txt
├── README.md
├── pyproject.toml
├── requirements.txt # new
├── src
└── tests
「run」コマンドを使うと、Hatch独自の仮想環境で実行できるのでパッケージがインストールされるか試してみます。
$ hatch run python3 -c "import requests; print(requests.__version__)"
2.31.0
「requests」ライブラリのバージョンをプリントできたので無事インストールされています。
Hatchの環境内でテストとリンターを実行する
Hatchの「run」コマンドを実行すると、Hatchの環境下において登録されているスクリプトを実行することができます。
Linuxで言うところのシェルスクリプトです。
Hatchプロジェクトを新規作成した際にデフォルト値として定義されているスクリプトは以下です。
# pyproject.toml

[tool.hatch.envs.default]
dependencies = [
  "coverage[toml]>=6.5",
  "pytest",
]
[tool.hatch.envs.default.scripts]
test = "pytest {args:tests}"
test-cov = "coverage run -m pytest {args:tests}"
cov-report = [
  "- coverage combine",
  "coverage report",
]
cov = [
  "test-cov",
  "cov-report",
]
「tool.hatch.envs.default」テーブルでテスト用のPythonパッケージをインストールします。
そして「tool.hatch.envs.default.scripts」テーブルによって各種スクリプトが定義されています。
スクリプトが定義されているキーを「run」コマンドに渡してあげるだけで、そのスクリプトを実行することができます。
$ hatch run test
======================================================== test session starts ========================================================
platform linux -- Python 3.10.0, pytest-7.3.2, pluggy-1.0.0
rootdir: /mnt/c/Users/hatch-project
collected 2 items

tests/test_scraping.py ..                                                                                                     [100%]

========================================================= 2 passed in 1.71s =========================================================
上記のスクリプトは「tool.hatch.envs.default.scripts.test」キーに定義されている「pytest」が実行された結果です。
「tool.hatch.envs.default.scripts.cov」キー指定して実行してみます。
$ hatch run cov
cmd [1] | coverage run -m pytest tests
======================================================== test session starts ========================================================
platform linux -- Python 3.10.0, pytest-7.3.2, pluggy-1.0.0
rootdir: /mnt/c/Users/hatch-project
collected 2 items

tests/test_scraping.py ..                                                                                                     [100%]

========================================================= 2 passed in 1.80s =========================================================
cmd [2] | - coverage combine
Combined data file .coverage.ideapad.1441.848197
cmd [3] | coverage report
Name                            Stmts   Miss Branch BrPart  Cover
-----------------------------------------------------------------
src/hatch_project/__init__.py       1      0      0      0   100%
src/hatch_project/scraping.py      15      0      4      0   100%
tests/__init__.py                   0      0      0      0   100%
tests/test_scraping.py             19      0      2      0   100%
-----------------------------------------------------------------
TOTAL                              35      0      6      0   100%
上記のスクリプトは「tool.hatch.envs.default.scripts.test-cov」キーに定義されている「coverage run -m pytest」と「tool.hatch.envs.default.scripts.cov-report」キーに定義されている「- coverage combine」及び「coverage report」が実行された結果です。
モジュールのテストについては以下の記事をご参照ください。
「tool.hatch.envs.default」テーブルの環境は主にテストを実行する環境ですが、「run」コマンドでは他の環境も実行することができます。
HatchはPythonリンターも実行することができるようにサポートされています。
以下はPythonリンター用に区別された環境です。
# pyproject.toml

[tool.hatch.envs.lint]
detached = true
dependencies = [
  "black>=23.1.0",
  "mypy>=1.0.0",
  "ruff>=0.0.243",
]
[tool.hatch.envs.lint.scripts]
typing = "mypy --install-types --non-interactive {args:src/hatch_project tests}"
style = [
  "ruff {args:.}",
  "black --check --diff {args:.}",
]
fmt = [
  "black {args:.}",
  "ruff --fix {args:.}",
  "style",
]
all = [
  "style",
  "typing",
]
「tool.hatch.envs.lint」テーブルはPythonリンター用のパッケージをインストールします。
そして「tool.hatch.envs.lint.scripts」テーブルによって各種スクリプトが定義されています。
テストを実行した時と異なるところは、「run」コマンド渡す引数に環境名も含めるところです。
「tool.hatch.envs.lint」テーブルの場合は「lint」という環境名となるので、「lint:キー」を「run」コマンドに渡します。
$ hatch run lint:typing
tests/test_scraping.py:3: error: Cannot find implementation or library stub for module named "hatch_project"  [import]
tests/test_scraping.py:3: note: See https://mypy.readthedocs.io/en/stable/running_mypy.html#missing-imports
Found 1 error in 1 file (checked 5 source files)
上記実行時に「pip」のバージョンアップが必要だった場合は、「run」コマンドでバージョンアップしてから再度実行してみましょう。
$ hatch run pip install --upgrade pip

$ hatch run pip --version
pip 23.x.x
他のスクリプトを実行する場合は以下のように指定します。
$ hatch run lint:all
cmd [1] | ruff .
src/__init__.py:1:8: F401 `src` imported but unused
src/hatch_project/__init__.py:5:1: TID252 [*] Relative imports are banned
src/hatch_project/__init__.py:5:23: F401 `.scraping.Scp` imported but unused
...
Pythonリンターについては以下の記事をご参照ください。
パッケージのバージョンとビルド
「new」コマンドでプロジェクトを新規作成すると、そのプロジェクトのパッケージにバージョン情報が割り当てられます。
バージョン情報を確認するには、「version」コマンドを実行します。
$ hatch version
0.0.1
pyproject.tomlの中身を見てみると、バージョン情報は「dynamic」キーに定義されています。
[project]
...
dynamic = ["version", "dependencies"]
...

[tool.hatch.version]
path = "src/hatch_project/__about__.py"
「dynamic」キーに定義されている値は動的に処理されるということなので、「tool.hatch.version」テーブルの「path」キーに定義されているファイルの中身から値を読み込んでいます。
「src/hatch_project/__about__.py」の内容は以下となっています。
# __about__.py

# SPDX-FileCopyrightText: 2023-present User-Name <sample@example.com>
#
# SPDX-License-Identifier: MIT
__version__ = "0.0.1"
バージョン情報は「X.Y.Z」という形式で表記されることが多く、それぞれの意味はざっと以下のようになります。
| 位置(X.Y.Z) | 意味 |
|---|---|
| X | モデルチェンジ |
| Y | マイナーチェンジ |
| Z | バグの修正やリファクタリング |
| aZ | アルファ版は、動くようになったが完成ではない |
| bZ | ベータ版は、不具合やバグは多いが大体できている(テストをしていない等) |
上記の内容をバージョン0.0.1で当てはめてみると、「バグの修正や誤字脱字なんかを変更」という意味の情報となります。
再び同パッケージのプロジェクトが発足された際に、バージョンをアップデートしたい場合は「version」コマンドを使ってそれぞれの「X」「Y」「Z」に当てはまる表記を変更することができます。
例えば、「一部の機能の処理速度を上げるためにコードを改変した」という内容でバージョン更新するとなると、恐らくマイナーチェンジに当てはまると思うので、更新後のバージョンは「0.1.0」という位置づけになります。
バージョンの更新をHatchの「version」コマンドで実行すると以下のようになります。
$ hatch version minor
Old: 0.0.1
New: 0.1.0
バージョン0.1.0に更新することができました。
バグや誤字脱字も修正したよと言う場合は以下のように実行します。
$ hatch version micro
Old: 0.1.0
New: 0.1.1
まとめてバージョン情報を更新したい場合は、「version」コマンドに複数個指定することができます。
$ hatch version minor,micro
Hatchでサポートされているバージョン情報のセグメントは以下の公式ドキュメントで確認できます。
ビルドの実行は、Python公式ドキュメントの「Python のプロジェクトをパッケージングする」でも使用されているビルドバックエンドの「hatchling」によって配布用パッケージに変換されます。
「build」コマンドを実行して開発モジュールをパッケージ化します。
$ hatch build
パッケージ化されたファイル群は「dist」ディレクトリ内に集約されます。
.
├── LICENSE.txt
├── README.md
├── dist # new
│   ├── hatch_project-0.1.1-py3-none-any.whl
│   └── hatch_project-0.1.1.tar.gz
├── pyproject.toml
├── requirements.txt
├── src
└── tests
開発モジュールの最終バージョンと合っているか確認します。
$ hatch version
0.1.1
pipを使って「dist」に納められているアーティファクトをインストールすることができるので、環境を変えて実行してみます。
# hatchがインストールされている環境を出る
$ deactivate

# 「.test」仮想環境を作成して有効にする
$ python3 -m venv .test && source .test/bin/activate

(.test)$ pip install dist/hatch_project-0.1.1.tar.gz
インストールが完了したら、パッケージの詳細情報を表示してみます。
(.test)$ pip show hatch-project
Name: hatch-project
Version: 0.1.1
Summary:
Home-page:
Author:
Author-email: User-Name <sample@example.com>
License:
Location: /mnt/c/Users/hatch-project/.test/lib/python3.10/site-packages
Requires: bs4, requests
Required-by:
インポートが問題無くできたら成功です。
(.test)$ python3 -c "from hatch_project.scraping import Scp; print('OK')"
OK
PyPIにアップロードする
配布用パッケージとしてのアーティファクトができたら、Hatchを使ってPyPI(Python Package Index)に公開します。
Hatchはデフォルトで「PyPI」と「TestPyPI」にパッケージをアップロードできるよう設定されています。
アカウントを持っていない場合はこちらの記事で作成手順を掲載しているので参照してみてください。
パッケージの公開(アップロード)は「publish」コマンドを実行して認証情報と共に送信しますが、「NoKeyringError: No recommended backend was available. Install a recommended 3rd party backend package; or, install the keyrings.alt package if you want to use the non-recommended backends. See https://pypi.org/project/keyring for details.」というエラーが発生した場合はエラー内容に記載されている推奨される認証バックエンドの代替として「keyrings.alt」パッケージをインストールしておきます。
$ pip install keyrings.alt
「publish」コマンドを実行して公開先の認証情報を指定します。
# プロンプトでのアップロード
$ hatch publish
Enter your username: username
Enter your credentials: password
dist/hatch_project-0.1.1-py3-none-any.whl ... success
dist/hatch_project-0.1.1.tar.gz ... success

[hatch-project]
https://pypi.org/project/hatch-project/0.1.1/
認証情報は「keyring」パッケージによって保存されるので、次回のパッケージ公開時の認証は自動で行われます。
保存された認証情報を確認するには、「keyring」コマンドを実行して確認できます。
※引数にある「main」はHatchで予約された名前です。
$ keyring get main username
'password'
始めて「publish」コマンドでユーザー名とパスワードを使って公開した直後にキャッシュファイルとして「previous_working_users.json」が作成されます。
「previous_working_users.json」の在り処は、「config.toml」で確認することができます。
「config show」コマンドで「config.toml」の一部の情報を取得することができます。
$ hatch config show
...

[dirs]
...
cache = "/home/user/.cache/hatch"
「dirs」テーブルの「cache」キーに定義されている値がキャッシュファイルが配置されているパスです。
「previous_working_users.json」の中身を見ると「main」とユーザー名が紐づかれているのが分かります。
# previous_working_users.json

{"main": "username"}
ユーザー名やパスワードをやり直したい場合は、「/publish/index/previous_working_users.json」とkeyringに保存されたパスワードを削除します。
# キャッシュファイルの入ったpublishディレクトリの削除
$ rm -rf /home/user/.cache/publish

# 保存されたパスワードを削除
$ keyring del main username
PyPIに公開することができたら、別の環境を使ってインストールを行ってみます。
※以下はビルドを行った際に作成した仮想環境です
# 仮想環境内を空にする
(.test)$ pip freeze >> uninstall.txt
(.test)$ pip uninstall -r uninstall.txt -y

(.test)$ pip install hatch-project
インストールが完了したら、パッケージの詳細情報を表示してみます。
(.test)$ pip show hatch-project
Name: hatch-project
Version: 0.1.1
Summary:
Home-page:
Author:
Author-email: User-Name <sample@example.com>
License:
Location: /mnt/c/Users/hatch-project/.test/lib/python3.10/site-packages
Requires: bs4, requests
Required-by:
PyPIのAPIトークンを使ったパッケージの公開
PyPIのAPIトークンを作成する方法は以下の記事をご参照ください。
再度、パッケージの公開手続きを実行してAPIトークンを使って認証します。
# dist内のアーティファクトを削除
$ hatch clean

# バージョンをマイナーチェンジ
$ hatch version minor
Old: 0.1.2
New: 0.2.0

# ビルドを開始
$ hatch build
[sdist]
dist/hatch_project-0.2.0.tar.gz

[wheel]
dist/hatch_project-0.2.0-py3-none-any.whl
「publish」コマンドに「-u(--user)」と「-a(--auth)」オプションを使用して認証を行います。
「-u」オプションには「__token__」を設定し、「-a」にはパッケージ専用のAPIトークンを設定します。
$ hatch publish -u __token__ -a api-token
dist/hatch_project-0.2.0-py3-none-any.whl ... success
dist/hatch_project-0.2.0.tar.gz ... success

[hatch-project]
https://pypi.org/project/hatch-project/0.2.0/
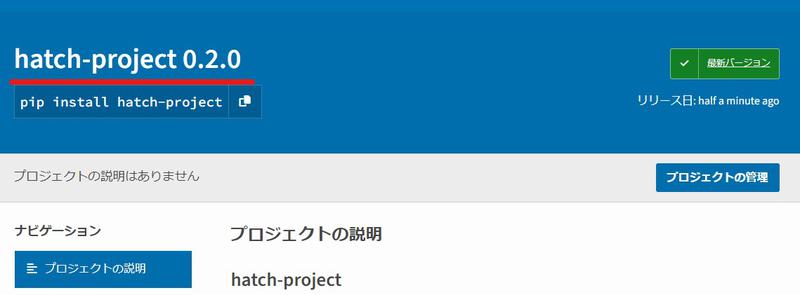
PyPIサイトでバージョンが更新されていれば成功です。
Hatchプロジェクトマネージャーでは、CIワークフローを有効にすることによってGitHubのActionsで実行できるワークフローも自動で作成してくれます。
Hatchの環境設定
Hatchで構築されるプロジェクトの環境は「config.toml」の設定値によって変わります。
「config.toml」を弄ることによって新規作成されるプロジェクトの「pyproject.toml」のデフォルト値を決めることができます。
Hatchの「config.toml」が配置されているディレクトリは「config find」コマンドで確認できます。
$ hatch config find
/home/user/.config/hatch/config.toml
「config.toml」の中身を確認したい場合は「config show」コマンドを実行します。
$ hatch config show
mode = "local"
project = ""
shell = ""

[dirs]
project = []
python = "isolated"
data = "/home/user/.local/share/hatch"
cache = "/home/user/.cache/hatch"

[dirs.env]

[projects]

[template]
name = "User-Name"
email = "sample@example.com"

[template.licenses]
headers = true
default = [
    "MIT",
]

[template.plugins.default]
tests = ture
ci = false
src-layout = ture

[terminal.styles]
info = "bold"
success = "bold cyan"
error = "bold red"
warning = "bold yellow"
waiting = "bold magenta"
debug = "bold"
spinner = "simpleDotsScrolling"
上記の設定値を変更すると、プロジェクトが立ち上がる際の環境を変更できます。
変更する際は「config set」コマンドを実行します。
引数には変更したい「テーブル.キー」と「バリュー」を指定する必要があります。
試しに「config.toml」に定義されている「template」テーブルの「name」キーの値を変更してみます。
$ hatch config set template.name new-name
New setting:
[template]
name = "new-name"
変更後は以下です。
$ hatch config show | grep 'name'
name = "new-name"
デフォルトのテスト環境を無効にしてオリジナルのスクリプトを作成する
Hatchプロジェクトを新規作成すると、デフォルトではテストとリントのスクリプトが実行できるように「pyproject.toml」によって定義されており、「tests」ディレクトリが作成されます。
例えばDjangoプロジェクトではプロジェクト直下ではなくアプリ直下にテストファイルが配置されているので、「tests」ディレクトリやテストとリントのスクリプトは必要なくなります。
なので、「config.toml」の「template.plugins.default」テーブル内を編集してテスト環境を無効にしてしまいます。
Hatchの「config set」コマンドを使うと「config.toml」内を編集することができます。
実行例は「config set テーブル.キー バリュー」といった感じです。
以下はテスト環境を「true」から「false」に設定しています。
$ hatch config set template.plugins.default.tests false
New setting:
[template.plugins.default]
tests = false
プロジェクトを作成してみます。
$ hatch new hatch-tests-false
hatch-tests-false
├── src
│   └── hatch_tests_false
│       ├── __about__.py
│       └── __init__.py
├── LICENSE.txt
├── README.md
└── pyproject.toml
このようにすると、テストに必要な環境設定を構築せずにプロジェクトが作成されます。
テスト環境が無効になっているプロジェクトの「pyproject.toml」を開いて以下のように
テーブルとキーを設定します。
キーには「echo」コマンドの値を定義しています。
...

[tool.hatch.envs.default.scripts]
test = "echo 'Hello Hatch'"
Hatchの「env show」コマンドを実行して、登録情報を確認します。
$ hatch env show
          Standalone
┏━━━━━━━━━┳━━━━━━━━━┳━━━━━━━━━┓
┃ Name    ┃ Type    ┃ Scripts ┃
┡━━━━━━━━━╇━━━━━━━━━╇━━━━━━━━━┩
│ default │ virtual │ test    │
└─────────┴─────────┴─────────┘
スクリプトには「test」が登録されました。
Hatchの「run」コマンドを使ってスクリプトを実行します。
$ hatch run test
Hello Hatch
これでDjango等で使用されるコマンドを定義し、自動化を図れるようになります。
GitHubのActionsに使うワークフローの作成を有効にする
HatchではGitHubのActionsで実行されるCIワークフローの自動作成もサポートされています。
GitHubのActionsについては以下の記事をご覧ください。
以下はCIワークフローを有効に設定しています。
$ hatch config set template.plugins.default.ci true
New setting:
[template.plugins.default]
ci = true
Hatchプロジェクトを作成してみると、「.github」ディレクトリが作成されているのが分かります。
$ hatch new hatch-workflow-true
hatch-workflow-true
├── .github
│   └── workflows
│       └── test.yml
├── src
│   └── hatch_workflow_true
│       ├── __about__.py
│       └── __init__.py
├── tests
│   └── __init__.py
├── LICENSE.txt
├── README.md
└── pyproject.toml
新しく「.github/workflows/test.yml」が作成されています。
「test.yml」の中身を確認するとHatchコマンドでテストが実行されるように設定されています。
name: test

on:
  push:
    branches: [main, master]
  pull_request:
    branches: [main, master]

concurrency:
  group: test-${{ github.head_ref }}
  cancel-in-progress: true

env:
  PYTHONUNBUFFERED: "1"
  FORCE_COLOR: "1"

jobs:
  run:
    name: Python ${{ matrix.python-version }} on ${{ startsWith(matrix.os, 'macos-') && 'macOS' || startsWith(matrix.os, 'windows-') && 'Windows' || 'Linux' }}
    runs-on: ${{ matrix.os }}
    strategy:
      fail-fast: false
      matrix:
        os: [ubuntu-latest, windows-latest, macos-latest]
        python-version: ['3.7', '3.8', '3.9', '3.10', '3.11']

    steps:
    - uses: actions/checkout@v3

    - name: Set up Python ${{ matrix.python-version }}
      uses: actions/setup-python@v4
      with:
        python-version: ${{ matrix.python-version }}

    - name: Install Hatch
      run: pip install --upgrade hatch

    - name: Run tests
      run: hatch run cov
srcディレクトリを無効にする
Hatchプロジェクトで「src」ディレクトリを無効にする場合は、以下のように実行します。
$ hatch config set template.plugins.default.src-layout false
New setting:
[template.plugins.default]
src-layout = false
プロジェクトを新規作成してみます。
$ hatch new hatch-src-false
hatch-src-false
├── hatch_src_false
│   ├── __about__.py
│   └── __init__.py
├── LICENSE.txt
├── README.md
└── pyproject.toml
「pyproject.toml」に定義されているパッケージを読み込む為の相対パスもパッケージから始まっているので書き換える手間が省きます。
それでは以上となります。
最後までご覧いただきありがとうございました。